Christmas Countdown

onsdag 8. august 2012

Christmas

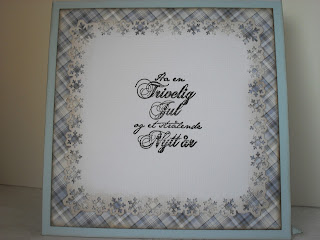
 When I saw this weeks sketch at Sketchy Colors I knew immediately that I wanted to make a card with it, and even better; I knew exactly how it should be too.
I bought the stampimage at Änglafröjd this summer. It's an absolutely lovely little shop in Arvidsjaur, in the north of Sweden. (Actually I bought "a few" more stamps there, and lots of papers, flowers and other stash...)
Well - back to the card; the sketch gave me the idea to kind of fold the frontsidepanels over each other - fun, or what!?!
All papers are leftovers, mostly from MajaDesign and Papirdesign. All edges are inked with DistressInk WalnutStain - can you imagine what my fingertips looked like after inking all these paperpieces??!??
I think blue and brown works quite well together, and I really like blue christmascards.

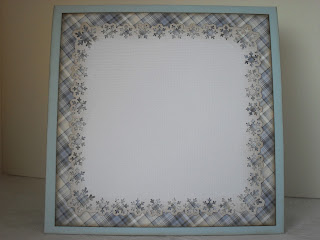
 Here's the imagepanel folded back, 
the back of it has got a little christmasgreeting (Kort&Godt) stamped on
(the front of the next panel has also got a greeting (Kort&Godt here too) stamped on:
 On the next picture the second panel is opened, and a third greeting (also this one from Kort&Godt) shows:
 Here the front of the card is completely opened, with all christmasgreetings to be seen. The two greetings on the last panel are from Kort&Godt (right side) and from Storyteller on the left side.
 Inside the card I punched out white panels with the same Martha Stewart PATP-set as I used on the front. I inked the edges with DistressInk WalnutStain, and stamped on a christmasgreeting (Norsk Stempelblad AS) on one of them.
Here's a closer look at one of my newest Tildaimages - I think she's sooo cute, and I've wanted her for so long! I coloured her with ProMarkers, using most every browncolour I have (and I have them ALL!) 
Around Tilda I put on some LiquidPearls (WhiteOpal) in various sizes.

I found inspiration for my christmascard in quite a few challengeblogs this time:
Sketchy Colors #125 - Sketch
Creatalicious Challenges #36 - Christmas in July
Christmas Card Challenges #36 - Use Something New
CHNC #84 - Favourite Colour(s)
Sparkles Christmas #19 - Punch It
PaperPlay Challenges #31 - Layer it Up
ProMarker Norge #8 - Alt er lov (Anything Goes)

***

tirsdag 7. august 2012

Vintage Wedding-Book

Today I'll show you another of the weddingcards I've made.
This time it's a book-card. Yes, I know I said I'd never make another one again, after the first one, but they're actually rather fun to make. And not so difficult as I thought back then...
I tried to get a vintage style on it - but looking at the pictures now, I'd call it more "shabby-vintage" - I don't seem to get a real grip on that perfect darkbrown vintage style. It always turns out a lot "lighter" than I plan for it to be! Althought I rip and tear and dye and ink and use dark distressInks (WalnutStain and VintagePhoto here), I don't get the right brown shade like other do. But I keep trying :)

Here's a picture of the book opened. 
Inside I put a little tag/card with a greeting stamped on (Storyteller):
I'll send my card to these challenges:
Scrappin' All Over #3 - Vintage Wedding
Scrappehuset Scrapp Stilen - Vintage
Hooked on Crafts #23 - Let's Celebrate
Papertake Weekly - Anything Goes
Vintage Udfordring #45 - Lav noget andet end kort (Not a Card)

***

mandag 6. august 2012

Wedding Card in White and Gold

The last weeks I've been working on some Weddingcards.
This is one of them.
I've used Cardstock and DPs in only white and gold.
To decorate the card I've used Martha Stewart punches, Spellbinders Dies (Heart Circles), flowers, leaves and different pearls - and goldcoloured Glimmermist.
I inked the edges of the diecuts with Gold.
The stamped texts (Storyteller and Kort&Godt) are goldembossed.

A few more pictures, to show details from the card:


Here are the challenges I'll send the weddingcard into:
Hooked on Craft #23 - Let's Celebrate
Try it on Tuesday - Anything Goes
Catered Crop - White Pages
Simply Greate Too #19 - Anything Goes
Crazy Amigo - Dies and Punches
Dream Valley #38 - Die Cuts and Punches


***

Oriental Challenge at Ooh La La

 Good morning everyone.
It's monday morning and time for a new challenge over at 
The coming fortnight the theme is Oriental, a challenge I hope you all will enjoy and participate in.
I must admit that I had some difficulties in the beginning making this card. Oriental card is someting I haven't made before... But luckily I found a lot of inspiring "stuff" on the CD Carnival of Colour (here).

 The next picture shows the front- and backside of the card. I punched lots of tiny white flowers that I put "randomly" around the image. Some are attached to some green wires, to continue the branches in the picture.  On the flowers in the picture I put on some teeny-tiny liquidpearls, for a little raised effect.

Inside the card I used papers from the same CD. I made a little pocket on the leftside, and put a tag into it.

Now I hope I've given you a little oriental inspiration.
Hop on ever to Ooh La La, to see what the rest of the DT-girls have made, to find more inspiration,
and join us.

fredag 3. august 2012

Tilda and Edwin By the Seaside

Here's the card I've planned to make for weeks now - I've worked on it a little bit now and then, between weddingcards and colourpractises :) 
I wanted to participate in Sketchy Colors latest challenge, which were to choose my 
 favourite SC colorcombo challenge AND your faourite sketch from the 2012 challenges
That was NOT an easy challenge, with so many georgeous sketches and lovely colourcobinations to choose from! I ended up with the colourcombo fram challenge #121; Red, blue & grey and the sketch from challenge #112. 
With the colours red, blue and grey I just had to use these marinelooking Magnolias - I think they are sooo cute! And I think they give a good summerfeeling - though we haven't had much weather for boattrips this summer...
The background is also a Magnoliaimage. Everything is coloured with DistressMarkers.
The papers are from MajaDesign and the cardstock are Bazzills. The edge on the grey cardstock is embossed with white embossingpowder. All edges are inked with DistressInk PumiceStone. Behind the imagescene I've tucked a layer of cheesecloth. Oh, and a tag, made with a Magnolia DooHickey :)
In the corners I've put on some red, blue and grey halfpearls. I used twine on the tag and on the sailboatcharm - I also tied a ribbon of it, maybe not very navylike, but I couldn't help it, I wanted it to be there...
 
Here's a closer look at Tilda and Edwin down by the seaside:

Here's the inside. The leftside panel is actually not fastened yet - I thought I'd wait 'till I know what greeting I'll use before I glue it down ;)

And the backside, I used the last third of the little "poem" thats in the bottomline of the DP. 
(The first two are on the frontside)

I'll send my card to these challenges:
Sketchy Colors #124 - Favourite SC Sketch + colour combo from 2012 challenges
Totally Tilda # 52 - "Summer Fun"
Card and Scrap #36 - Brug Stempler (Use Stamps)
NSHK # 58 - Anything Goes

***

tirsdag 31. juli 2012

Christmas in July

 Finally I've managed to get some photos that can be shown, of my july-christmascards.
I really need to find a new camera!!!
The three pictures I show today are the only acceptable of a total of about 60...
(I found it rather tricky to photograph shakercards - the plastic in the shakerboxes gave a silly shine on almost every picture)

July's challenge at Hjertebodens juleblogg was to make shakercards - well, at least one of the three cards has to be a shakercard. I like to make all three cards for their challenge in the same style, so this months three christmascards are all shakercards...
I have used Magnolia-images on the cards.
The first two ones are easelcards, with the same image. The first coloured with DistressMarkers and the one underneath with ProMarkers.


My third christmascard for Hjertebodens Juleblogg is an ordinary 6"x6"-card. I tried to give the flowers the same colour as the one tilda's holding - this was the best I could do...

Card 1 and 3 are the ones I'm most satisfied with, so I'll send them to these challenges too:
Cutie Pie #23 - Christmas In July (card 1)
Crafts and Me #94 - Anything Goes (card 1)
Addicted To Stamps #35 - Weinachten im July (card 1)
Simon Says Stamp - Anything Goes (card 3)
Critter Sketch #126 - Anything Goes (card 3)
Party Time Tuesday's #79 - Anything Goes (card 3)

***

mandag 23. juli 2012

Recipe-Challenge at Ooh La La

Good morning everyone - it's monday and time for a new challenge at OLLCB.
This time we have a Recipe-challenge, a 1, 2, 3 Recipe-challenge, for you :)
1 IMAGE, 2 DPs, 3 EMBELLISHMENTS

I have used an image (The Magic of Winter) and papers from the "Boys To Men"-collection.
Seeing this image, I immediately knew that "this is it" - isn't it just adorable!!!
The three embellishments I've used are: Lace, Ribbon and some teeny, tiny halfbeads - you may have to look closely to find them ;)
On the background (the cardstock) I embossed some christmas-swirls and lots of snowflakes with clear embossingpowder.
All paperedges are inked with DistressInk WalnutStain.

Inside I used one of the papers from the outside, and made greetingpanels with a Martha Stewart PATP-set. 
On one side I stamped a christmasgreeting (Kort&Godt)...

...the other side I left blank, to write a personal greeting:

I hope as many as possible of you will hop over to OLLCB, to check out the Recipe-challenge, and to see what the rest of the DT have come up with - I'll tell you it's well worth a visit :)
Come on - join us!


Thanks a lot for visiting my blog,
as always I appreciate every visit and comment you make.


mandag 16. juli 2012

Tildas Bike

Yesterday i showed a card of Edwin with his bike. Today I have a card of Tilda with her bike to show you.
The image is coloured with DistressMarkers, colouring with them is getting more and more fun!
I made the card aftger the sketch at CLPs challenge #49  - a really fun sketch to work with, giving the chance to put on lots of layers, just as I like it.
I think I bought the Dps from Panduro (forgot to note it down before cutting, so please correct me if  I'm wrong). All edges are distressed and inked with DistressInk PumiceStone. 
On two of the paper I used Martha Stewart edgepunches - I just love the lacy paperedges!
The swirl (a spellbinders die) is inked with DistressInk TatteredRose. 
The fence (Magnolia DooHickey) is inked with DistressInk PumiceStone). 
On the bike (a die from Marianne Design) I sprayed on Glimmer Mist Tattered Rose.
The butterfly (MS punch) is also inked with DistressInk TatteredRose before I painted it over with GlimmerGlaze Champagne - I gave the blue rose a little brush of that glaze too...
When it came to choosing the laces I got completely stuck! I sat with a pink, a light blue, a light green and a white lace and couldn't at all decide which one to choose! I had to call in Hedda to ask her opinion - she rejected all of them! She meant I had enough colours and rather should use some that were "almost white". I think it worked perfect - big thanks to her, for helping me out here :)
On a shelf I found the pearlstrings I bought a long, long time ago.

With so many layers on the front I wanted to make the insides more simple, so I just put on a greetingpanel and a butterfly on each side. I used a Martha Stewart PATP around the panels. The butterflies are made with the same MS punch as I used on the frontside.


 I didn't want to cover this beautiful part of the DP with anything, so it had to be the backside of the card :)


On this close-up you can see the tiny Liquid Pearls I put around Tilda:
(and the halfbeads I used in two papercorners)

I found inspiration to make this card from these challenges:
CLP #49 - Sketch
Kaboodle Doodles #128 - Olympics, Sports, Outdoors, Adventures or Hobbies
Magnolia Stamp Lovers - Sugar  Tilda Only
Totally Papercraft #125 - Lots of Layers


Thanks a lot for visiting my blog

***

søndag 15. juli 2012

Edwins Bike - another birthdaycard for a boy

Two blogposts from me in one day! I'm pretty sure it won't happen again in a very long, long time. 
My boyfriends brother phoned to tell he'd bring over supper for us, so all of a sudden I got a little sparetime - I Love when such things happen!

Working on the birthdaycard for my son, I found that I do have quite a few Edwins too, not only Tildas. 
This is one I bought just recently. I think he's just sooo cool on his bike (of course I had to buy Tilda with her bike as well). 
At the same time I bought the bikedie, from MarianneDesign. I think it works so well with this image.
 I'm still practising with my DistressMarkers - a bit tricky, but I won't give up, at least not as long as I have fun practising...

a closer look at Edwin:

Here's the inside:
I used the same sketch, Dutch Magnolia Lovers #36, for the inside as for the front.
I stamped on several birthdaygreetings, and left one panel blank to write a more personal greeting.

Two of the panels are attached with brads, to be turned around to read the greetings underneath:

On the back I put on a little stamp I bought from Alota Rubber Stamps (for the prize I won in their challenge blog a few weeks ago :D )

Materials used:
Size: 6"x6"
Cardstock: Bazzill Kraft cardstock
DPs: Simple Stories and Glitz
Image: Magnolia, Alota Rubber Stamps
Texts: North Star Stamps, Norsk Stempelblad AS, Kreativ Hobby
Ink: Staz-On TimberBrown, Versafine Onyx Black, DistressInk WalnutStain
Dies: MarianneDesign, Magnolia Doohickey 
Punch: Marvy Uchida
Embelli'es: Brads, Ribbon, BallChain, Tickets (Tim Holtz), letterstickers.

I'll send this card to the following Challenges:
Dutch Magnolia Lovers #36 - Sketch
Tildas Town #9 - Card for a man or a boy... Use Edwin
Crafty Creations #178 - Free For All
Ett Trykk Trykkpressa  Juliutfordring - Noe for Gutta
Here Come The Boys #31 - Tag on a Card
Cards for Men #14 - Happy Birthday
Midweek Magnolias #19 - Let's Look At Edwin!

Sanders Birthdaycards - I've got a teenager in the house!

Last Friday was Sanders birthday - 13 years old on Friday 13th :)
As his favourite things to do are fishing and football (soccer) I and Hedda made cards with those hobbies as theme.
I used an Edwin-image (Magnolia), different fishingthemed papers and some stamps from the Kaisercraft "Hunt & Gather"-set. 
On the frontside I put on a "net" (a cutted garlicbag) and caught a few fish in it :) I also used some fishingrelated embellishments and charms.

Inside I made the left side into a "fishingbag" and put a tag into it. The fish here are more and less embossed with copperembossingpowder. The big fish is made out of a magnet. I cut the fishshape out of a magnet and glued it onto cardstock before I (cut out again! and) embossed it.
I put on a magnet underneath the DP on the right side to fasten the big fish to.
I also stamped, cut and embossed some smaller fish to put in the bag (a couple of them landed outside...)
Here's the tag, I believe the DP used here was a Kaisecraft-paper:
I'll enter Sanders birthdaycard into these challenges:
Midweek Magnolias #19 - Let's Look At Edwin
Tildas Town #9 - Card for a man or a boy... Use Edwin
Here Come the Boys #31 - Tag on a card


And this is Heddas card for her brother:
She chose to make a card with a soccertheme as this also is one of his big hobbies.
On the front she used a soccerimage that she stamped on Kraftcardstock and embossed with gold embossingpowder. She used a little magnet between the papers to make the image moveable (of course she wanted that effect too). The image is an old stamp from Kreative Hender AS.
She used papers from Panduro.
She put a charm onto the ribbon.

Here's the inside of the card:

...and the backside:
We'll send her birthdaycard to these challenges:

Crafty Creations #178 - Free For All
Trykkpressa Juliutfordring - Noe for Gutta

mandag 9. juli 2012

Exciting News

Today I have big news for you; Today my first DT-entry is to be shown at
Ooh La La Creations Challenges
A few weeks ago I was contacted by Anne, who asked me if I'd like to join their team - WOULD I!!!
I was thrilled, surprised, honoured - then I felt a little doubt; can I do it... Having thought about it, over a nights sleep, I decided I CAN do it - I WANT to do it - and here I am:

I'm a member of the OLLCB Design Team, from July to December 2012!

I really look forward to working with the rest of the DT-girls and to be useing the OLL-products.
When I got home from a businesstrip in the end of last week a CD had arrived for me - a CD packed with wonderful images and papers!
So this weekend I forced myself to do some really necessary housework between CD-looking, printing and cardmaking.
I've also found that I need a new printer! I bought a new some months ago, but I've never felt quite satisfied with it - It doesn't write as well as my old Hp, it writes sloooow and the inkcartridges only contains a spoonfull of ink (talking teaspoons!!!). It works well with digi-images printed for ProMarkers, but when I got my DistressMarkers I found that the ink were running when I coloured :(

Well - enough of that! This is my first DT-entry at OLLCB:
I finished this card before I got the CD with the new releases, so I've used papers from one of their previous sets.
The image is from Motivet. A stamp I've had for years, but forgotten completely until what I saw what would be the first challenge I'd inspire you to join:
Whiskers 
Doraline has whiskers :)
I coloured her with ProMarkers.
On the paperedges I used DistressInk WalnutStain.
I used both punches and dies, ribbons, flowers, halfbeads and rhinestones, glitterstickles and cheesecloth to decorate the card.
Underneath the imagepanel I tucked a tag:
On the inside I used a different paper (from the same set as the one I used on the front- and backside).
I punched two scalloped circles for greetingpanels inside. On one of them I stamped a birthdaygreeting from Kort&Godt, the other I left blank.
Now I hope you pop over to Ooh La La Creations Challenges to check out what the other DT-girls have made of fabulous creations (I've seen them, and they truly are wonderful!)
I also hope you've found a little inspiration here to join in on our WHISKER-Challenge.

søndag 1. juli 2012

Napkin Folded Wedding Card

I have made a Napkin folded card.
I wanted to make a wedding card, and wanted a kind of elegant folding.
The Napkin folding and the Magic Card folding are the most elegant folding techniques I know (by now), and for this card I chose the napkin fold.
This technique has lots af folds, a lot of measuring and cutting and a LOT of inking, as I chose to ink all edges on both the cardstock and the papers.
I used DistressInk WalnutStain for the inking.
Around the edges of the cardstock I used a Martha Stewart PATP-set. I used the same set to make the panel on the closing.The closing is made quite simple with a magnet underneath the designpapers.
The designpapers are from MajaDesigns Vintage Summer Basics-collection. I think I used both sides from two different papers.
On the front I only decorated with a greeting (from Papirdesign, I think), a ribbon, some pearls and some flowers.

Here I've opened the "belt":

Here's the card almost wide open,

Here come two pictures that shows the inside closer:


On the tag (Magnolia DooHickey I stamped a weddingimage (Panduro) both on the frontside:

...and on the back. The images are not coloured, only goldembossed:

Here's the list of challenges I'll enter the card into:
Scrappin' All Over - Vintage Wedding
Charisma Cardz - Anything Goes
The Paper Shelter -  Punches and/or Dies
Party Time Tuesdays - Anything Goes
Creative Inspirations - Anything Goes
Sweet Stampin' - Scallops
Delightful Challenges - Celebration
Stampin' for the Weekend - Show us your style

***