Christmas Countdown

onsdag 30. mai 2012

Birthdaycard in bluetones

Between confirmationcards I find a little time for other projects. This birthdaycard is one.
I've used DPs in different bluetones, most of the decorative elements on the card are in bluetones, as well.
The stamp is from Tickled Pink Stamps, and has become one of my favourites.
Of course it's coloured in Flex- and ProMarkers.
I've used DistressInk WalnutStain on all paperedges.
Here's also cheesecloth, lace, flowers, liquid pearls, ribbons, swirls and rhinestones.
Underneath one of the panels I've put a tag. The tag can be pulled out by the ribbon.
The flowers are sprayed with Glimmermist Turquoise Blue. 
The leaf is painted with a thin white paint, to let the green colour barely show through.
The greeting on the front is from Kreativ Hobby.

A closer picture of the image:

Inside the card I used the same papers as on the outside. 
The greeting is a stamp from Norsk Stempelblad AS.

On the right side one of the papers make a pocket where I can put some money:

I'll enter my monochromatic blue birthdaycard into these challenges:
 Kaboodle Doodles - Anything Goes
OLLCB - Make it Girly
Just Keep On Creating - Anything Goes
Corrosive Challenges - Not Too Shabby
Addicted to Stamps - Bingo (Monochrome/ Lace/ Distressing)
Allsorts - Happy Birthday
The Paper Shelter - Vintage or Shabby Chic


fredag 25. mai 2012

Yellow Birthdaycard

Wonderful Friday morning - no work today, grey, windy weather, the house is in a real mess - and do you know what; I don't care! Today I'll stay in my work room, cutting, glueing, colouring, glittering, listening to a book - doing all the things I really love! 
Maybe I'll go to the shop to get some food in the house, and maybe - just maybe - I'll put some clothes to wash. There won't be any homework to check when the kids get home from school, there's no work tomorrow, so I can stay up untill real late - I LOVE FRIDAYS! Don't you?

First of all I'll post the birthdaycard I've been working on the last days.
I'm not really a user of brightcoloured papers or bold colours, but I think I've managed it quite well with this one - It's a little bit of both bright and bold, don't you think???
I used lots of different dies and punches, ribbons, liquid Pearls, a sunflowercharm - and distressInk (WalnutStain) on ALL edges. The greeting is from Kort&Godt, and fits perfect onto the tag from the  Spellbinder Fancy Tag set.

Inside the card I used a paper from Primas Sun Kiss Collection as background. Around the panels I used a Martha Stewart PATP-set. The butterflies are also Martha Stewart-punches.
The birthdaygreeting is from North Star Stamps.

Here's a close-up of the two Tildas laying in the flowers. I had big doubts buying the papers from Primas Sun Kiss Collection, but I found them so summery and "happycoloured"  with the big sunflowers and lovely butterflies that I couldn't resist them...
Colouring the Tildas clothes, I think I used ALL yellowcoloured ProMarkers.

Here's a list of the challenges I'll send my card to:
Magnolia Stamp Lovers - Hip 2B Square
OLLCB - Ribbon or Twine
Kort o Mania - Bingo (Punch/ Bling/ Osteklut)
Crazy 4 Challenges - Birthday Card
Paper Pretties - Bold Bright Colours
Crafts and Me - Fabulous Flowers
Delightful Challenges - 5 or more Flowers
Joanna Sheen - Happy Birthday


Just a quick post today - now I'll head back to my workdesk.
Have a nice day everyone, thanks a lot for stopping by. 
Your comments make me even happier than crafting does ---or should it be "do" ???


***

torsdag 24. mai 2012

Girly Confirmationcard

Last sunday Sketchy Colors came with an absolutely wonderful sketch. I loved it immidiately! 
But what would I make out of it???
I knew it had to be a confirmationcard - I just had to find which stamp and what else to use. 
I spent some time trying out different ideas before I landed on this image from Tickled Pink Stamps and the papers from Kort&Godt ("Liljekonvall" must be one of the prettiest papers I've had - it hurt to cut in it!) and Inkido.
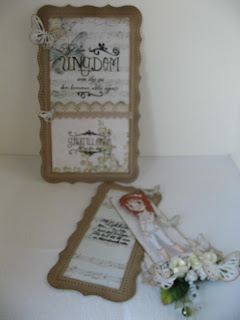
I made the "basecard" with a pocket, where I could put another card into. The "other card" has the image attached with a brad so it can slide open, and show a greeting both underneath the image and on the pocket.
I've stamped a greeting on the basecard too, that shows when the tagcard is pulled out (see next picture).
After cutting and punching the cardstock (Bazzill Kraft) and papers I brushed over them with DistressInk WalnutStain. I used several punches from Martha Stewart, corner- and edgepunches and my beloved butterflypunches. I also used one of the dies from Spellbinders Fancy Tags- set.
The image is coloured with Pro- and Flexmarkers.

Here's a picture of the tagcard pulled out of the basecard:

...and the backsides. The tagcard has a greeting here as well.

Heres a close-up of the image, and most of the decoration:

Here are the challenges I'll participate in:
Sketchy Colors - Sketch
Scrapperiket - Fugler/ Sommerfugler
Kaboodle Doodles - Dressed for Success
Bearly-Mine - Anything Goes
Just Keep On Creating - Anything Goes
Bunny Zoe's Crafts - Anything Goes

***

søndag 20. mai 2012

Confirmationcard in Violet and White

I'm still working on my confirmationcards. Today I'll show you one in violet and white, with a black-and-white-coloured Magnoliaimage on. I use the WarmGrey ProMarkers when I colour black/white-images. I still practice on browncolours to find the right tones to colour a sepiacoloured image - without any luck yet...
The designpapers (in- and outside) are from Papirdesign. I used different punches and dies for decorations. All in white (or whitish) papers/ cardstock. Some of them I even used white paint over too, though they were white. I also used lots of DistressInk (WalnutStain) on the edges.
Underneath the image you can see the cheesecloth, the doily and a piece of lace - And a tag, made with a Magnolia DooHickey. On the tag I used a textstamp from Kort&Godt, and tied a heartcharm to it with a violet/white-coloured twine. On the picture I stamped the edge of a postalstamp (Kaiserkraft), and put on some halfbeads. On Tildas dress I put on a little glitter. I also used (a lot of) glitter on the roses.
Here's the inside of the card. The paper has nearly the same colour as the paper I used on the outside, but when I took this picture the sun showed up, and I didn't think of taking new pictures of the frontside before I loaded the pictures into the PC.
The inside is folded to make a pocket where there's place for a greetingcard. This one has a greeting from Papirdesign on one side. On the other side I left the doily (Die from Marianne Design) blank, to write a personal greeting too.

Now, here are the challenges I'll send this card to:

Tilda's Town - Anything Goes
Deep Ocean - What a Wonderful Woman
Anonyme Scrappere - Blomster og Blonder (Flowers and Lace)
Corrosive Challenge - Flowers and Doilies and Bling
OLLCB - Ribbon or Twine (or both)
I Love ProMarkers - Anything Goes
Kort o Mania - Bingo (Øverste rekke vannrett: Punch/Dies - Bling - Osteklut/Doilie og Nederste rekke vannrett: Bånd/Blonder - Blomster - Charms/ Metall)


onsdag 16. mai 2012

Christmas in May


This weekend I finished my May-Christmas-Projects. At Hjertebodens Juleblogg they wanted us to decorate a paperbag - in layers! At first I thought I didn't have any paperbags, but going through my boxes and drawers I found many, many (50 - 60!), in many different sizes too :)
So I chose to decorate three different sized paperbags.

Warning: LOTS of pictures coming:

The biggest one I decorated in traditional, red and green, christmascolours, 
as Craftyhazelnut's Christmas Challenge latest challenge sounds:
The stampimage is Sarah Kay, the greeting is from Norsk Stempelblad AS. The text behind the image is a norwegian translation of "'Twas the night before christmas", from North Star Stamps.
I think that text is perfect to this image - and together they make the paperbag fit into Christmas Crafting!s challenge "Twas the Night BeforeChristmas".
I coloured the image with ProMarkers.
Designpapers are from Papirdesign and Flair Designs.
I used a edgepunch from Martha Stewart.
The panels are sewn together, with several shabby seams. Edges ares distressed (DistressInk WalnutStain), ripped and torn - You name it!...
Then I put on some shiny halfbeads, a glimmermist-sprayed (Iridescent Gold) flower and leaves.
The swirls around the image is made with a stamp from Panduro:
The backside, Clean And Simple, with a label to write a personal greeting:

This bag has a ribbonclosing:

 
The second paperbag is a little bit smaller, and decorated in frosty blue and white colours 
(with a touch of brown).
Papers on this one are from Papirdesign and MajaDesign.
On this one I'm back to Magnoliastamps again :)
I coloured this image too using ProMarkers (and a little icicles Stickles, and Crushed Velvet Cupcake flock and bon bon flock).
The fence is a Magnolia DooHickey Die, the lamppost a die from Marianne Design and the heart is Joy! Crafts.On the heart I stamped the text "Last Christmas", from Magnolia that too.
I also used a Martha Stewart Punch set (edge + border)
Close-up showing Tilda and her snowmanfriend with their "flocked clothes". If you look closely you can also see the Liquid Pearls I dropped around the edge of the "doily" (a die from Marianne):
Again, the backside is Clean And Simple, with a greeting from Norsk Stempelblad AS and a snowflake (Magnolia DooHickey):
This bag has a velcroclosing:


My last paperbag is just 4" X 6".
This one is also decorated with Magnoliaimages coloured with ProMarkers - and flock and glitter, oh, and I used Liquid Appliqué on the christmastrees. It puffs so lovely when heated, and make the trees look so wonderful heavy with snow :)
All these images should make it fit into Just Magnolias challenge "More Than One Stamp!"
The challenge at Sparkles Christmas Challenge is "Christmas Tree", so I'll enter this paperbag there as well :)
Underneath the circlelayer I tucked a Magnolia DooHickey-tag with a stamped greeting on (actually it has a different greeting on both sides, both from Kort&Godt). The ribbon tied to it is from Martha Stewart.
The greeting on the lid is from TPC Studio. I stamped it with Versamark and heatembossed it with white embossingpowder, to get a snowlook. The "O" in "SNOW" actually is a snowflake on the stamp, so I just punched a hole through it and put a snowflakebrad in, to close the paperbag.
The cheesecloth and white embossing on the fence (Magnolia DooHickey Die) doesn't show well in the picture, neither does the shimmer on the doily, and not the tiny snowflakes that I put on so many of...
On the backside I used a snowman-image and the text "Frosty the Snowman", both from Magnolia.

 With these three paperbags my May-christmasprojects is completed - I look forward to see what challenge Hjertebodens Juleblogg has to give us in June. 
(I hope it won't be too difficult, 'cause making christmasprojects in the summer isn't easy :s)


Thanks a lot for taking the time to look and read. 
As always, I really appreciate all you visitors - and love your comments.

fredag 11. mai 2012

Another Confirmationcard

Today I have another confirmationcard to show. This time a card for a girl with danceinterests.
I tried to show different dancingstyles, and used both pictures and a digistamp. I used the sketch from Sketchy Colors latest challenge when I made the card. I made one of the sketchelements into a tag that can be pulled out. On the tag I put on the digistamp, coloured with ProMarkers. I put a silvercoloured chain on the tag, and fastened some ribbons and "dance"-charms to it.

Two pictures showing the tag a little better:


(the greeting here is a stamp from Kort&Godt):
And here's the inside, with a greeting from Papirdesign stamped on:

I'll enter the card into these challenges:


Sketchy Colors - Sketch
Card and Scrap - Brug Metalpynt
Kort o Mania - Anything Goes
Deep Ocean - What a Wonderful Woman!

lørdag 5. mai 2012

Confirmationcard

I'm making confirmationcards most of the time these days. This is one of the latest I've made.
Isn't this digi-stamp, bought from Make it Crafty, just georgeous! I love the joy and happiness in this image.
Of course I've used my ProMarkers to colour it. I also put a little glitter in her hair, don't know if it shows if the picture is enlarged...
The butterflies (Martha Stewart punch) and the flowers have also got a little glitter on.
The flowers with Stickles Diamon and the butterflies are misted (Glimmermist Dazzling Diamonds).
I put on some pink halfbeads and som teeny-tiny pearls made with Liquid Pearls.
The papers are all from Papirdesign, with distressed edges.
Inside the card I stamped a greeting (Papirdesign), and made a pocket to make room for a tag. 
The greeting on the tag is a rub-on I wrote on the PC and printed on Digi-Decal Rub-On-paper. A lot easier than finding the right place on the paper to print out the text...

I'll enter my card into these challenges:
CLP - Sketch
Kort o Mania - Alt er lov (Anything Goes)
Papertake Weekly - Anything Goes
Creative Craft Challenges - Anything Goes
Lollipop Crafts - Anything Goes

Thanks a lot for visiting my blog.